Build Your Admin Panel Without CSS or HTML

Table of contents
An admin panel usually refers to the set of tools available to the administrator of a web application for overseeing the app. The administrator is usually an owner or superuser who has permission to create, edit and delete certain components of a web page normally hidden from a regular user. The admin panel usually provides all the settings and tools used for system administration.
It’s not uncommon for web apps with sophisticated, complex, and beautiful user interfaces to have pretty bland admin panels. This is because the admin panel is hidden from the app's primary users and usually isn’t considered a priority. They’re also not very much fun to build because of the amount of repetitive work that goes into creating one.
In cases like this, developers would benefit from a tool that makes the process of building an admin panel easy without the need to write code. This would of course drastically reduce the amount of time and number of developers needed to work on building the admin panel. This is where Appsmith comes in.
Appsmith is an open-source framework that helps developers build dashboards, workflows, pages, and CRUD apps with little to no code. You can connect to APIs or databases like MongoDB, PostgreSQL, or MYSQL, as well as get access to charts, widgets, and other customization tools for building a UI.
In this article, you’ll learn how to set up Appsmith locally. You’ll create a new application, connect an API to it, and build an example admin panel using widgets and pages.
Getting Started with Appsmith
To begin, you'll need to sign up for Appsmith (it's free!), if you don’t already have an account. You can also deploy a Docker image on a server. For the purposes of this tutorial, you’re going to create a local instance of Appsmith using Docker.
Read the instructions here to set this up for your operating system.
Visit localhost in your browser to see the local version of Appsmith.
Create a local account to log in.
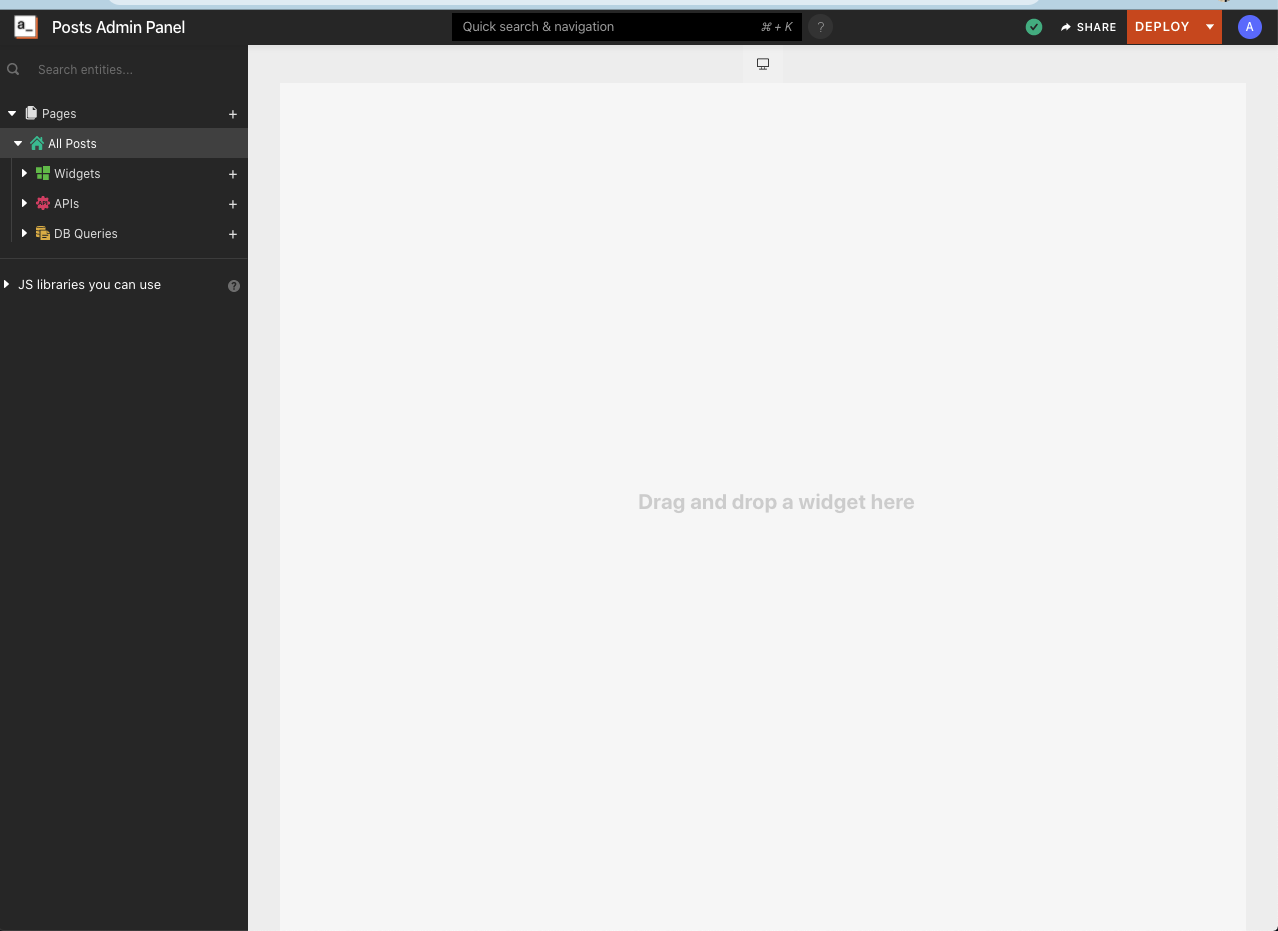
Click Create New to create a new application and name it Posts Admin Panel This take you to an empty workspace with a sidebar.
On the sidebar, you should see items like Pages, API, and DB Queries in a folder-like structure. Under Pages, a new page, Page1, already exists. Rename it as All Posts
Connect to a Data Source
To work with Appsmith, you need a data source. This can be in the form of an API or a database. Appsmith supports MongoDB, MySQL, and PostgreSQL among others.
Make a connection to a database by clicking the plus icon near DB Queries on the sideba under a page.
Click New Datasource to see a list of different database options.
Select your preferred database option and provide the relevant configuration details required to connect to your database server. As for connecting to APIs from Appsmith, you can hit any REST API endpoint available on the internet.
For the purposes of this guide, we'll connect to a fake API service called JSON Placeholder.
On the sidebar, under All Posts, click on the plus icon near APIs. Click Create New , and you should see a new API page.
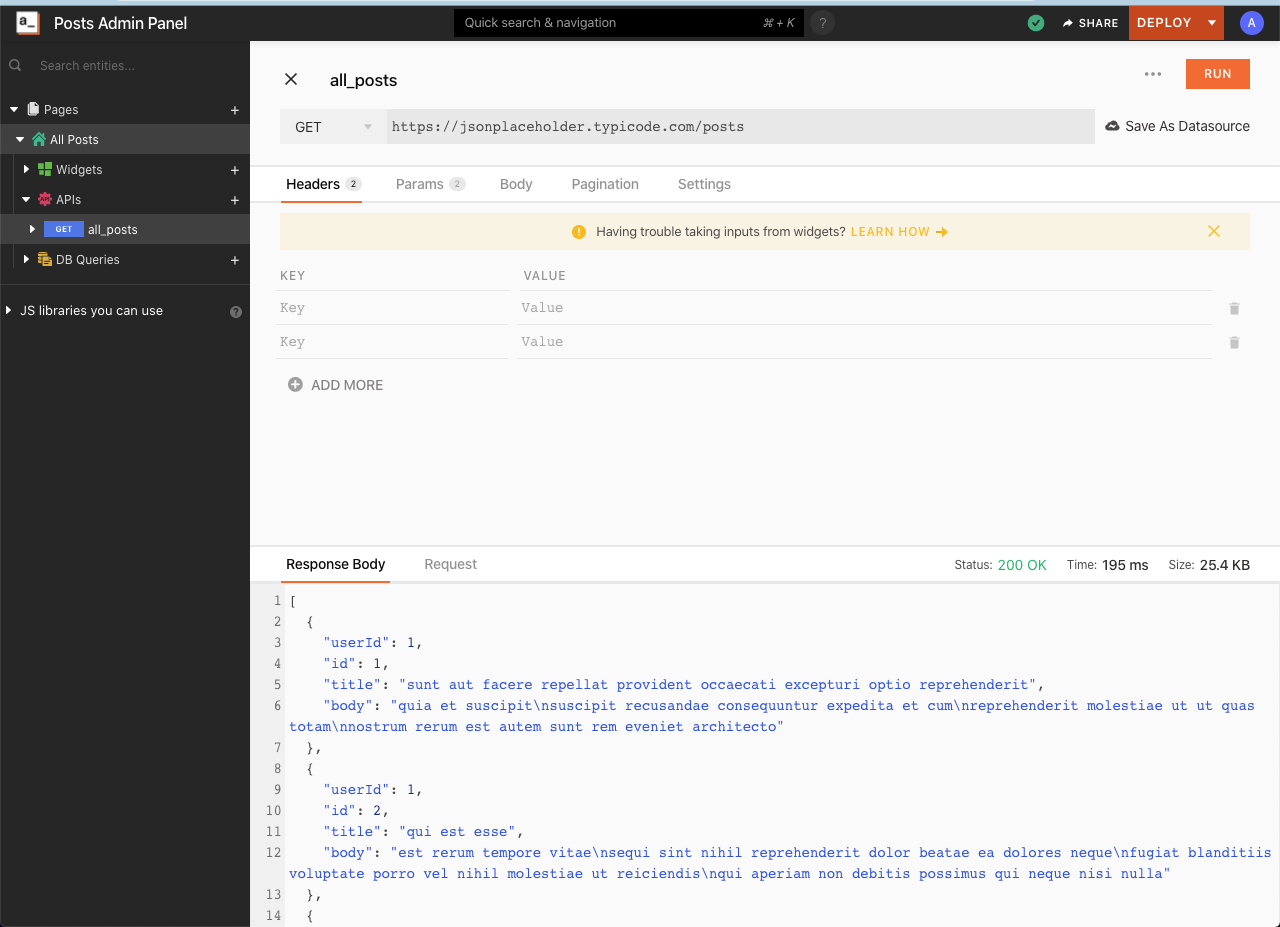
On the upper left corner, change the API name from Api1 to all_posts and paste https://jsonplaceholder.typicode.com/posts as the URL.
Click RUN to test run the API. In the Response Body section, you should see some data. This is the data you’ll display on the All Posts page in the coming section.
Create the First UI View
Go to the previously created page All Posts. On this page, you’ll display a list of posts on a table using the Table Widget.
Add a table to the page by clicking on the plus icon near Widgets.
Drag and drop Table to the page workspace.
Click the gear icon to configure the table.
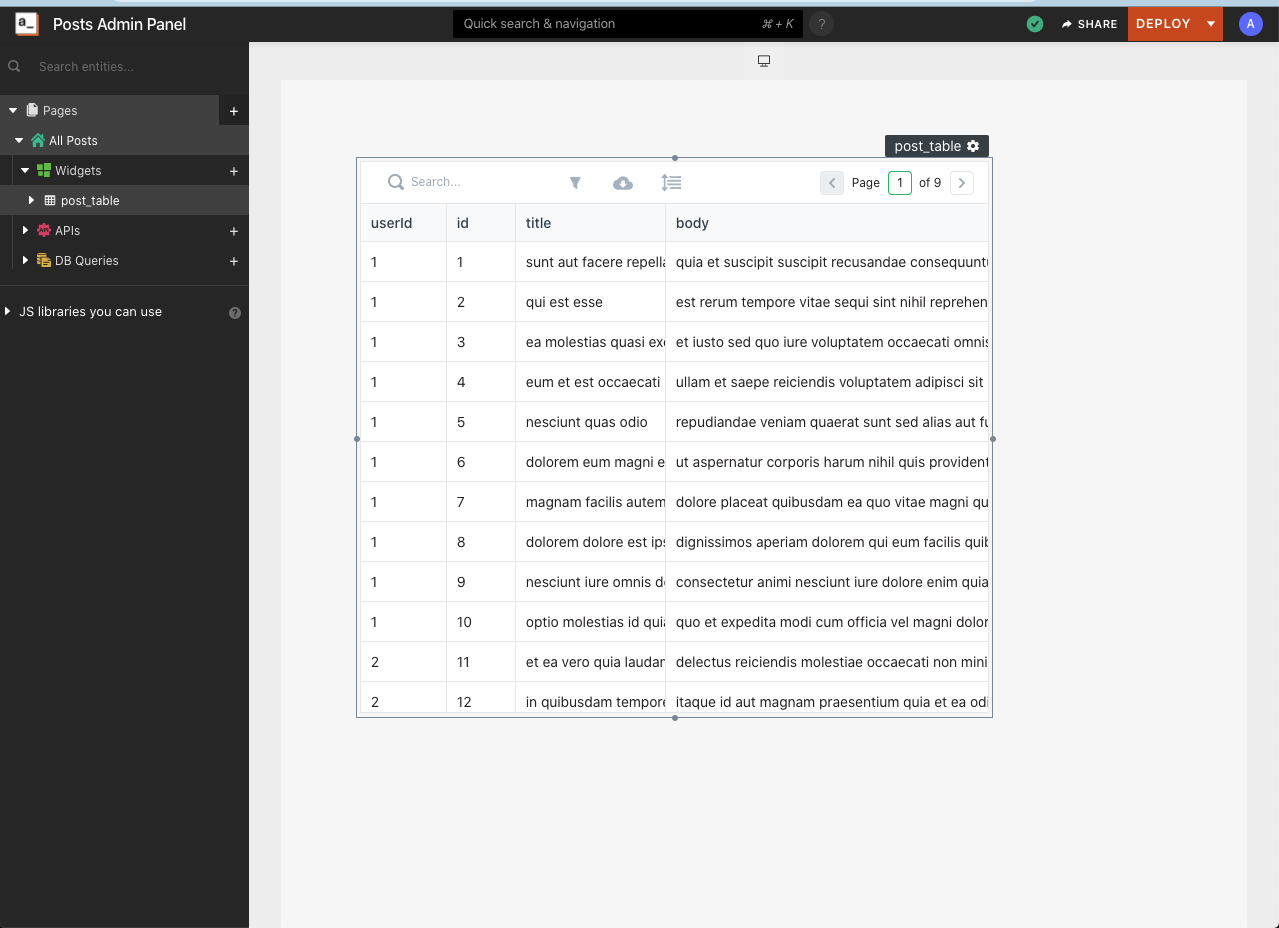
Change the table name from table1 to post_table.
In the Table Data section, erase the dummy data and paste {{all_posts.data}} into it. This will pull data from the all_posts API you set up in the previous section.
Now you should see all of the posts on the table, with their respective columns and rows. The table comes with filtering, pagination, sorting, and a search bar.
Next, add a button that will create a new post. Once the button is clicked, you want it to open a new page that contains a form for creating a new post.
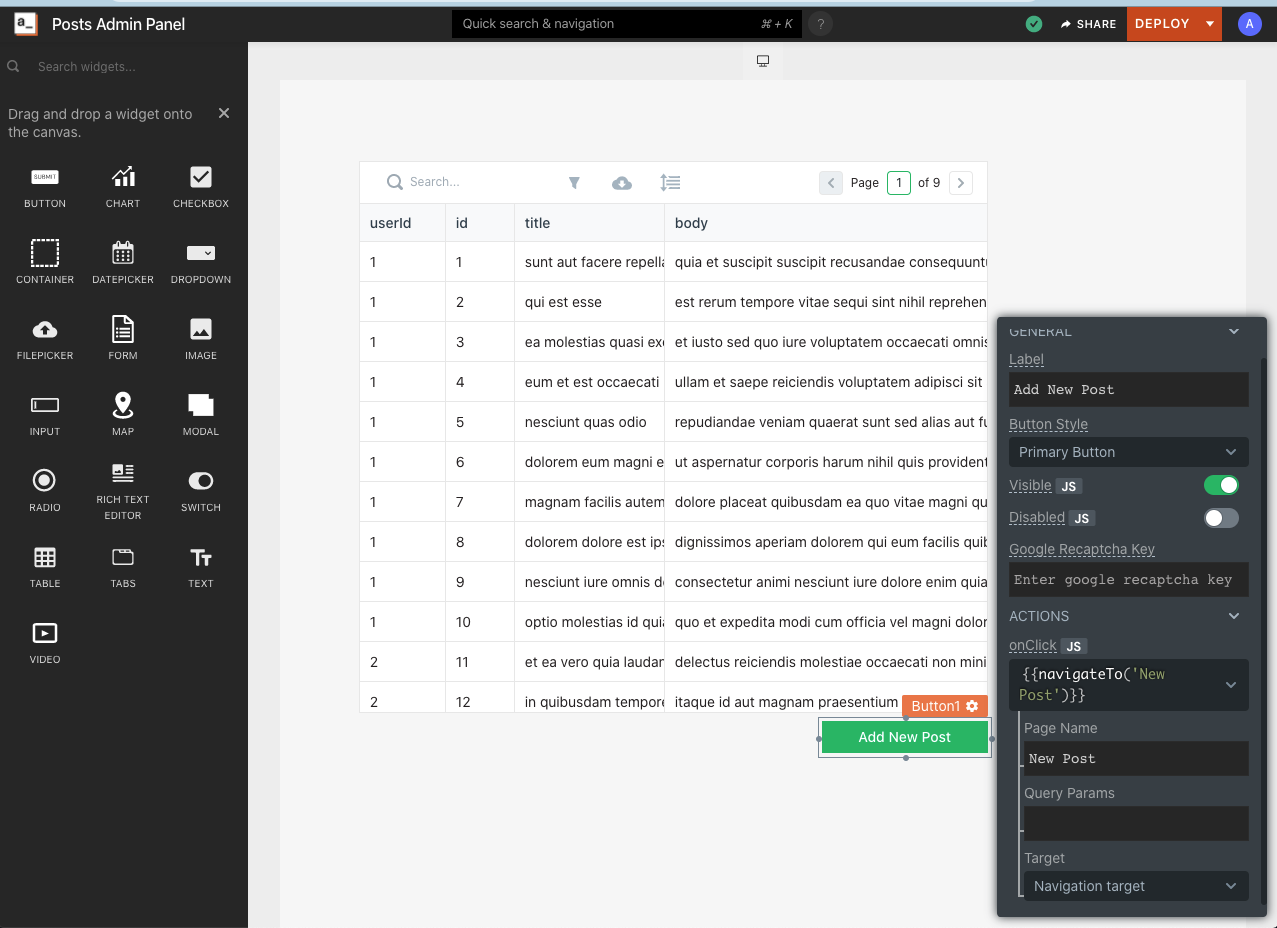
Drag the BUTTON widget to the bottom of the table and label it Add New Post.
Click the gear icon of the button, in the ACTIONS section.
Click the onClick dropdown and choose Navigate to. The Page Name box should appear.
Type in New Post as the page name.
Create the Second UI View
In this section, you’ll create a New Post page.
Create a new page and rename it New Post.
Go back to the All Posts page. You should notice that clicking the Add New Post buttotakes you to the New Post page. On this page, you’ll create a form that can be used for addi new posts.
Drag the Form widget to the workspace.
Rename the form text Create Post.
Click the gear icon on the form and change the name from form1 to new_post_form.
Add a Text widget and label it User ID:
Drag the Input widget in front of it and change its name from input1 to user_id.
Set the data type as Number and toggle the Required checkbox as checked.
On the next row, add a Text widget and label it Title:.
Drag the *Input widget in front of it and rename ittitle.
On the next row, add a Text widget and label it Body:.
Drag the Rich Text Editor widget in front of it and rename it body.

CRUD Records in UI
In this section, you'll see how to configure the application to add and delete records using the fake API.
Adding Records
The form has two buttons at the bottom that controls how the form works:
Reset clears the form of filled-in data.
Submit is meant to handle the submission of the form.
To configure Submit to submit the form data, follow these steps:
Click the gear icon on Submit.
Go to the Actions section.
Select onClick and choose the action Call an API.
Select Create API. This takes you to the API interface.
Define the API that adds posts in this section by doing the following:
Change the API name from Api1 to create_post.
Change the method from GET to POST and paste the URL https://jsonplaceholder.typicode.com/posts.
On the Body tab, define the JSON that will be sent to the fake API:
{
"userId": "{{new_post_form.data.user_id}}",
"title": "{{new_post_form.data.title}}",
"body": "{{new_post_form.data.body}}"
}
In the above sample, new_post_form refers to the form you created in the New Post page, while .data refers to the form's filled-in values.
Appsmith allows you to access all the data on the form by referring to the widget's unique name. To see the data being sent:
Go to the new_post_form, fill in the table with data, and submit it.
Navigate to _New Post > APIs > create post on the sidebar.
Click the Request tab. You should see the last sent request body and how the data variables previously defined are now substituted with the real values you just entered when you submitted the form.

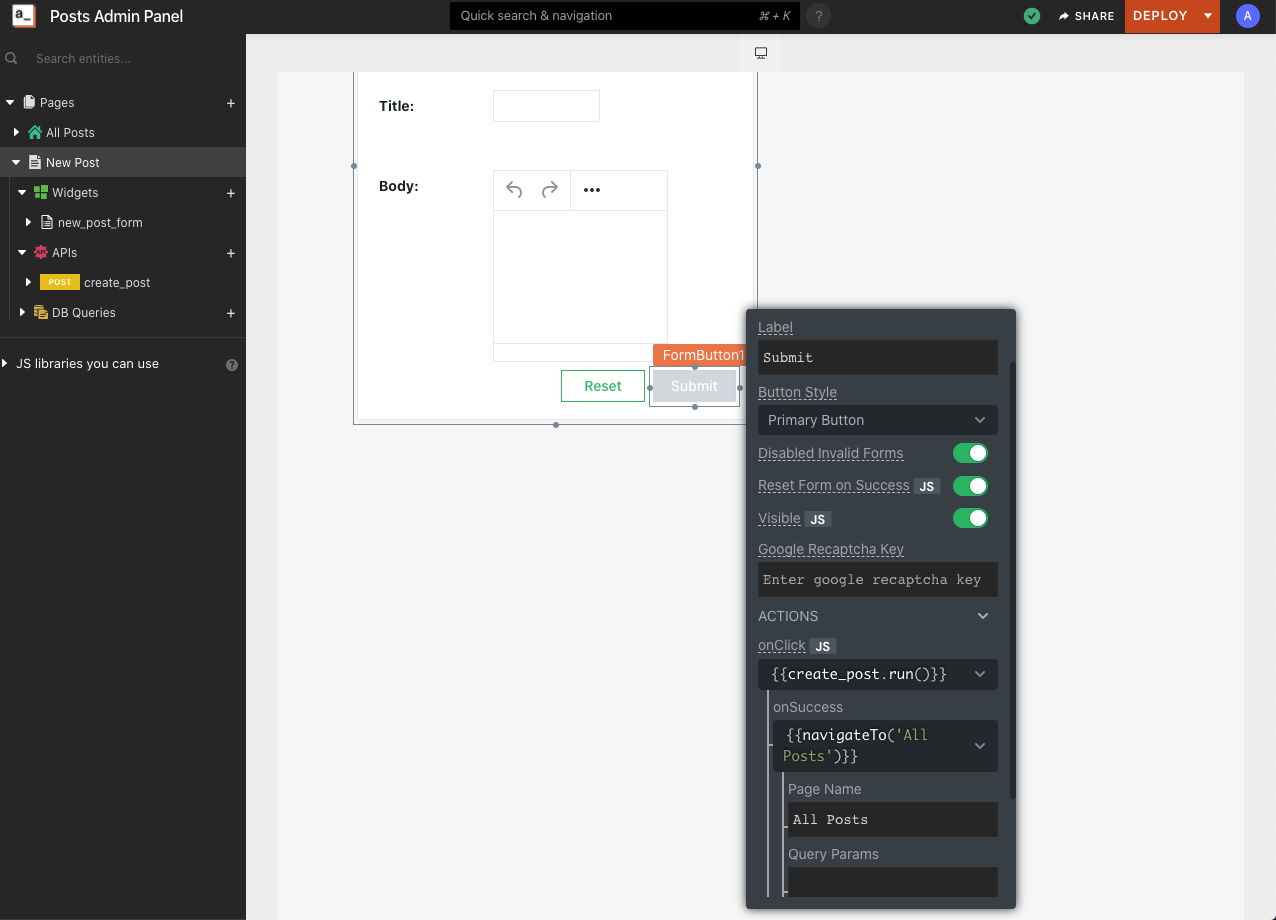
You've now configured the form's Submit button to call the create_post API when the form is submitted. You can also define the action to take after submission. To do this:
Go to the New Post page and click the gear icon on the Submit button.
Click onSuccess.
Select the action Navigate to.
In the page box, type in All Posts. This means that when the form submission is successful, you want the page to redirect to the All Posts Page.
Test this by filling in the form with data and submitting it. The page should redirect to the All Posts page.
Delete Records
To demonstrate how to delete a post using the Appsmith tools, go to the All Posts page and add a Delete button to the last column of the post_table:
Click the table's gear icon and click Add a new column.
Rename the column Action.
Click the gear for the new column and change the Column Type to Button. Rename the button label as Delete.
Change the button colour to Red.
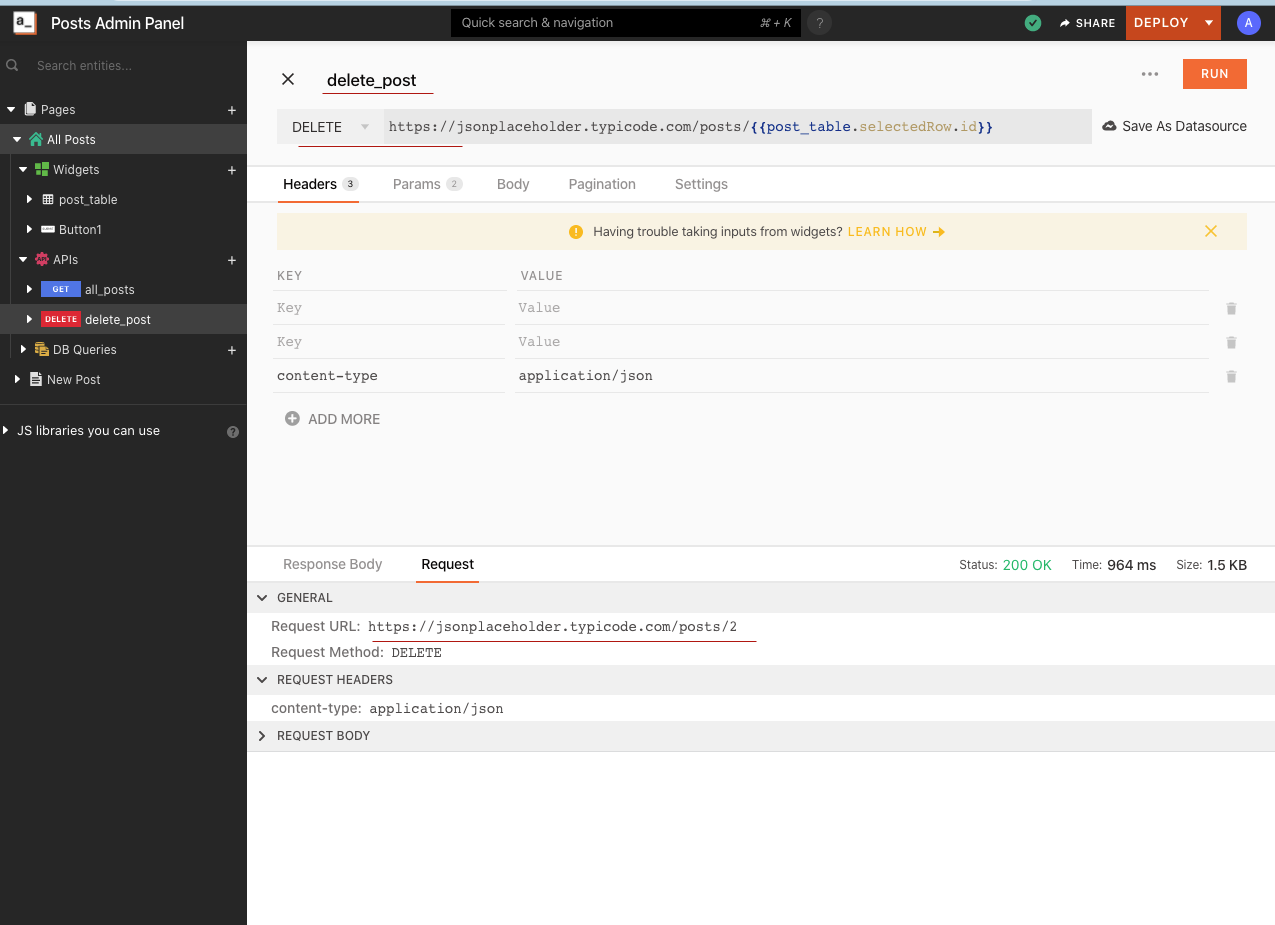
Let's define a new API called delete_post.
On the sidebar, under All Posts, create a new API and name it delete_post.
Change the API method to DELETE and paste the URL as https://jsonplaceholder.typicode.com/posts/{{post_table.selectedRow.id {{post_table.selectedRow.id}} refers to the post_table on the All Posts page, while selectedRow.id refers to id of the selected row about to be deleted from the table.
Go back to the post_table settings and click the gear icon for the colum Action.
In the onClick section, select the Call an API action from the dropdown and select the delete_post API.
In the onSuccess section, select the action Show message, then type in Post Successfully deleted! in the message box.
Choose Success as the type.
In the on Error section, select the action Show messag, then type in Failed to delete Post! in the message box.
Choose Error as the type.
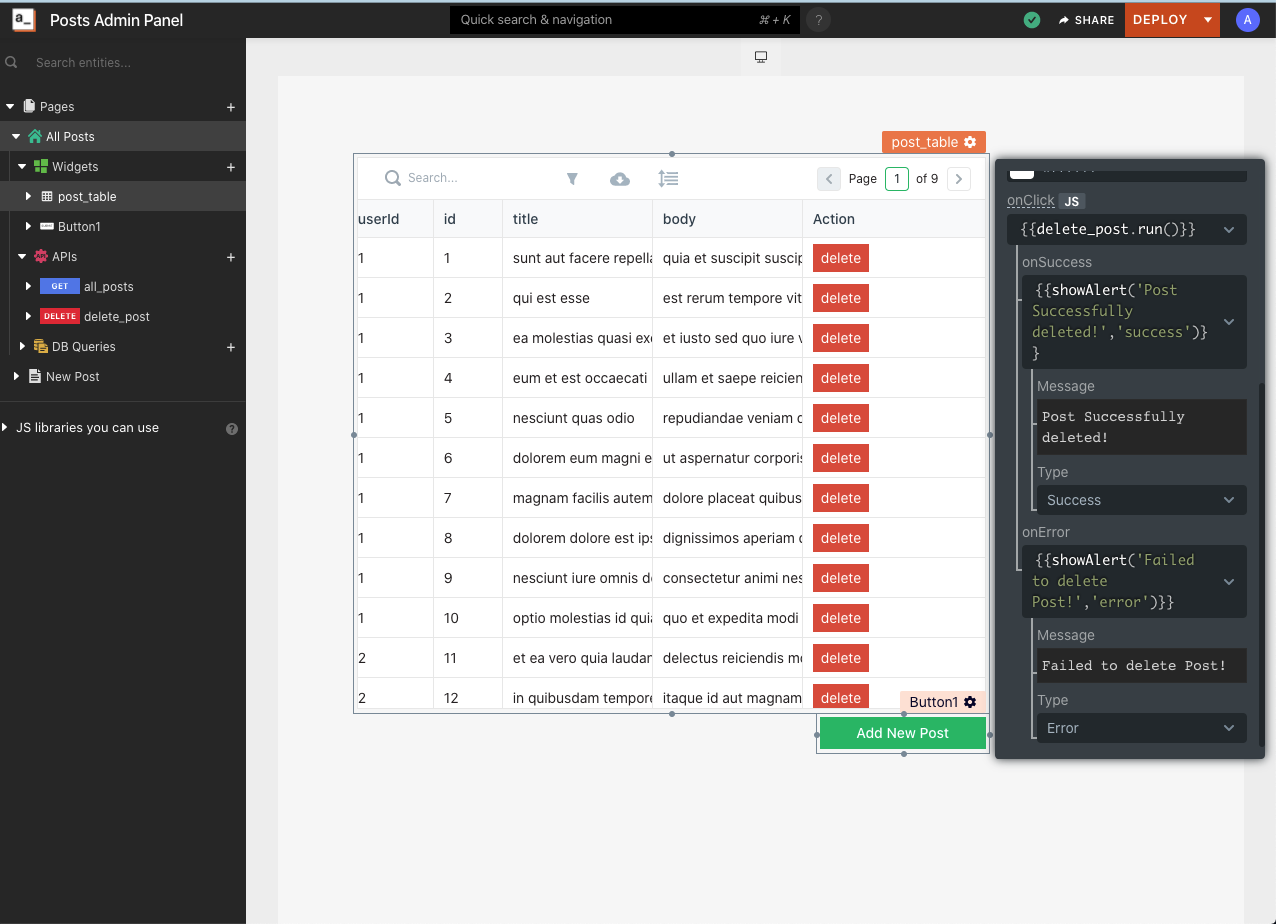
Clicking the Delete button would send an API request using delete_post and then show the success message.
Of course, the selected post does not really delete since we’re using a fake API. But it does demonstrate how you would configure deletion with a real API on an admin panel.
Conclusion
You've seen how easy it is to build an application on Appsmith, specifically an admin panel. This guide covered how to create an application and connect it to a database, as well as how to add and delete data. You learned how to build interactive pages, work with widgets, and customize them for your purposes.
Building an admin panel with Appsmith is a fast way to build admin tools. Check it out if you’d like to save your developers time and get internal tools launched faster.
Author Bio: Adeyinka is a software engineer based in Lagos, Nigeria, currently at BriteCore. She loves researching and writing in-depth technical content.
Related Blog Posts